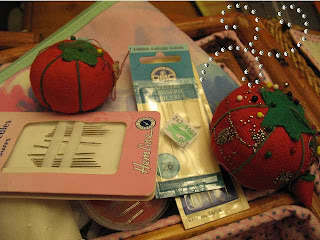
In my wandering through blog world, I saw an adorable needle book and became inspired to create one of my own. My stash of sewing needles has been stored in the tomato pincushion that my dog used as a chew toy several years ago and a mixed lot of packaging (warning: ugly un-organized photo below!)
I am NOT a seamstress in any way shape or form, but thanks to my 9th grade home ec. teacher, Mrs. Anderson, I know how to use my sewing machine, and it has proved very useful over the years. The base of the project literally took 10 minutes to finish and was VERY easy with minimal sewing machine usage involved. Plus I was able to use the scraps of pink and white felt leftover from making my daughter's poodle skirt !! Recycle it baby...
You need:
a sewing machine
felt (measurements below) in 2 different colors
a set of snaps
embroidery floss
So you will start by cutting one color felt (your cover) 8" x 5". Then using the other color, cut the pages for your book 7" x 4 1/2". Cut 2-3 of this size depending on how many needles you need to store. Also cut one piece for your closure in the same color as your cover. This should be cut to 2" x 1/2".
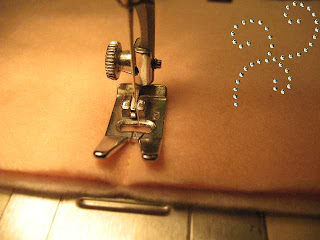
Lay your cover down and then lay your pages stacked on top. I would use a few pins to secure these together and using your sewing machine, stitch a simple straight right down the middle to bind everything together. I would make 2 passes with your machine to take care of any stress on the seam.
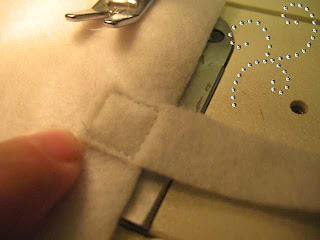
Now your book is complete. Let's attach the closure. Take the small strip and flip your book upside down so that you are looking at the back flap of the outside cover. Using another straight stitch, secure one end of this strip in the middle of back.
Now, let attach our closing mechanism. I would like to add that you CAN use a button instead of snaps, but I was out of buttons (darn!) If you want to do the button, just attach the button to the front cover and cut a slit in the end of the strip as a button hole. If using the snaps, hand stitch your pieces into the appropriate spots.

Your basic book is now done. I will show photos below of how I embellished mine, but you can do this at your leisure and own taste :) Here you can see all my needles organized and no longer hiding down in my horrid little tomato!!! (Blogger wouldn't let me turn this photo for some reason...)

Now as previously mentioned, I like to dress up my projects, so using embroidery floss, I hand stitched this cute little flower design onto the front cover (once again, really missing my buttons as center pieces.) I will add these after making a stop at the store!

A back stitch is very simple to do... use this Stitch Guide from A Feathered Nest
because she does it a ton better than I do :)
I felt (there's my pun!) like my edges needed something, so I finished off everything with what I think may be called a blanket stitch???
And there you go! A needle book. I think these would make a fantastic inexpensive gift for anyone on your gift list who is a sewer...beginner all the way to expert! Let me know if you have any questions.
Toodles...Angie

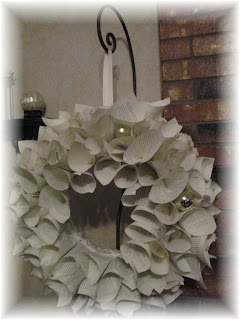

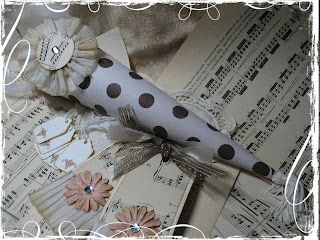
 Her tutorial is very easy to follow and the project turns out beautifully. Please do pay attention to the pencil tip as I burned the tar out of my hands, so do be careful. I added in some little tufts of tulle and a few ornaments to dress mine up! I am just pleased as punch with the outcome!


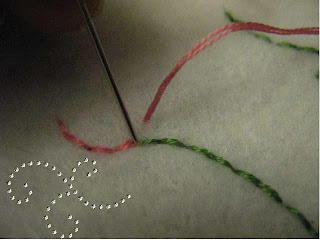
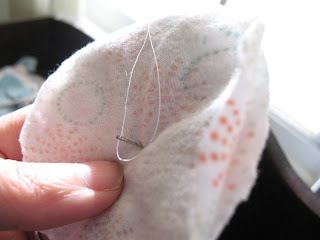
 This piece actually creates the top two layers. Place this piece on top of the remaing unfolded strip. Thread and knot your string (do a double knot to make larger knot so it won't pull through your paper.) Pinch your paper strips together and starting at one end start sewing your strips together.
 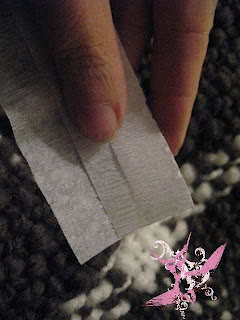 Weave the needle through the paper LOOSELY and once your needle is full, pull the paper onto the thread.
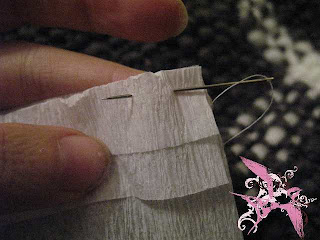
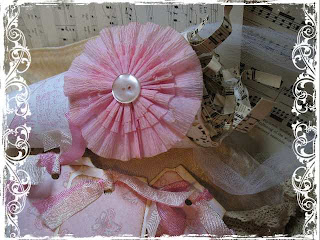
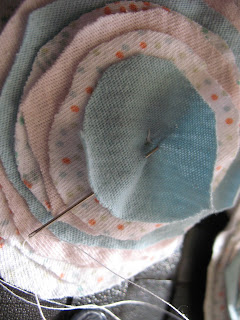
 Once you have reached the end of the strip, pull the paper tighter into the thread and your streamer will begin to make the rosette.
 The trickiest part is right here: you must tie off the string. Put your needle through the two last "pleats" and make a knot.
 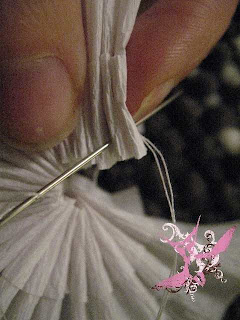 Cut off your string and using your glue, adhere both ends of the rosette together.
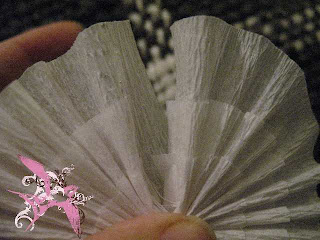 I usually pinch them together for a good seal. Now you decorate to your hearts content!!!


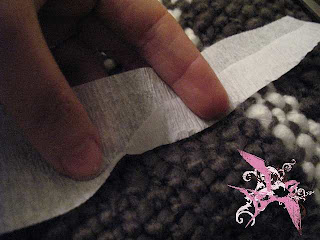
 This will create a ruffled effect. Then repeat with the othe
 r layers. If it gets too ruffled, you may want to do every other layer (this will depend on what kind of fabric you use.)
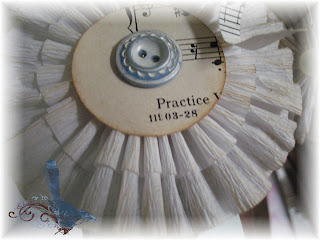
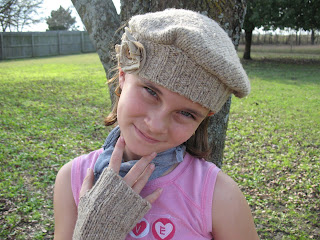
  Now stitch on your button and voila`, a fabric flower!! Easy peasy style... You can use these for a million uses. Add to hats, shirts, scarves, make a cute brooch, dress up a headband, put on pillows or add to gift wrapping!
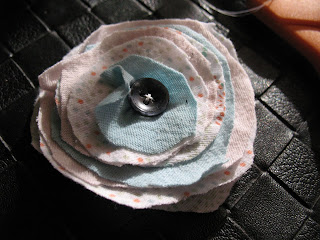 Let me know if you have any questions...Now, what are you waiting for? Off you go to make easy peasy flowers!~
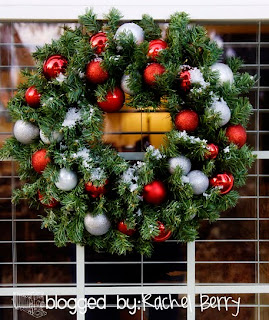


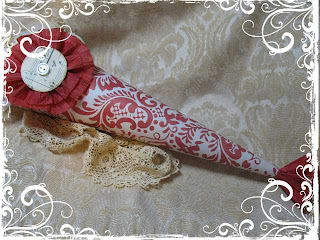
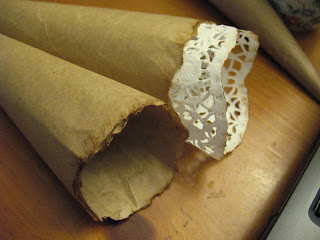 Your top probably looks not so nice (right?), so for this cone I chose to rip my papers for a rough edge, but you can use decorative scissors for scalloped edge, or in cones past I have traced a pattern inside the cone and cut out a smooth edge too. Now using your ink pad/sponge and gently ink the outside for that slightly aged look. Now for your inner cone. I usually use a doily for this, but you could use another type of paper. I would suggest that you cut it into a circle shape(use a dinner plate as a guide and this will make for a good pre-finished edge. Once again roll into a cone shape and play with it. Drop this cone into your first cone and let it unroll until it matches matches shape with your larger cone.
 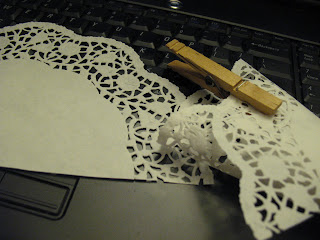 Using your clothes pin again, secure this second cone and remove it. Now apply your glue and then ink the edges as before. Once the glue is dry, apply glue to the INSIDE upper edge of your first cone and now re-insert your small cone inside. Ink the edge of this cone as well. Using the hole punch, make 1 hole on either side of the cone and thread through your ribbon or tulle as a hanger. Viola`!! It is done. Now comes the fun part...decorating. I have used a crepe paper rosette that I made, but you can use buttons, lace, silk flowers, whatever looks good to you! When you are all done, lightly stuff the shredded paper (or whatever filler you are using) inside. If you have any questions, just email me or leave a comment and I will help you out!!
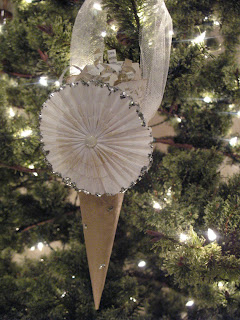 Here are some of the other ones that I've created!